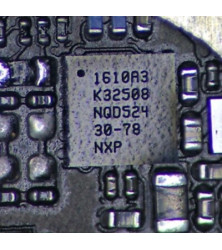
Repairing a Tristar IC (Integrated Circuit) is one of the most common yet delicate logic board procedures performed by the technicians at Console Wizard. This tiny chip acts as the "gatekeeper" for the iPad’s charging system; when it fails—often due to using non-certified "knock-off" Lightning cables—the device may refuse to charge, fail to connect to a computer, or suffer from rapid battery drain.
The Diagnostic Process
Before the soldering iron even warms up, the team uses a dedicated "Tristar Tester" or a DC power supply to confirm the IC is the culprit. A faulty Tristar chip typically manifests as a "fake charge" (where the iPad shows a charging icon but the percentage never increases) or a total lack of current draw.
Precision Micro-Soldering
Because the Tristar IC is roughly the size of a grain of sand and located on a densely packed logic board, the repair requires high-level micro-soldering:
Disassembly: The iPad is carefully opened—a feat in itself given the strong adhesive used on the digitizer.
Removal: Under a high-powered microscope, the technician applies heat-resistant Kapton tape to protect surrounding components. Using a precision hot-air station, they reflow the solder to gently lift the defective chip.
Cleaning: The tiny pads on the logic board are cleaned of old solder and oxidation to ensure a perfect "seat" for the new component.
Installation: A brand-new, OEM-grade Tristar IC is aligned and soldered into place using a specific heat profile to avoid damaging the board’s layers.
Quality Assurance
At Console Wizard, the job isn’t finished once the chip is on. The iPad undergoes a full "USB Ammeter" test to ensure it is drawing the correct current to ensure your Ipad is returmed back to you fully working


 Security policy
 Delivery policy
 Return policy